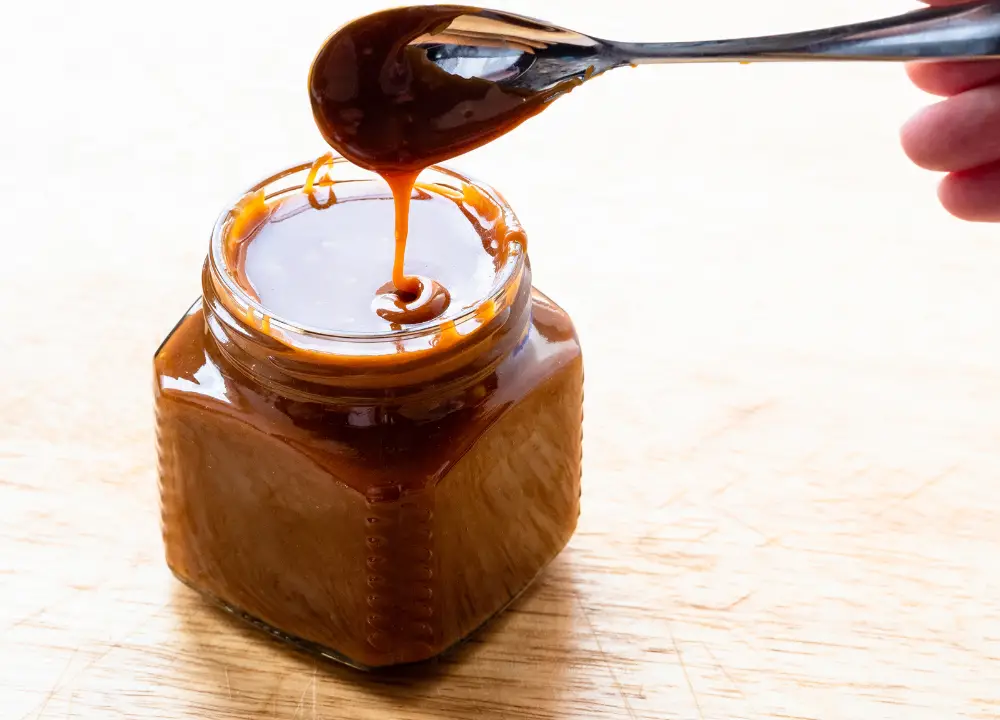
Making caramel syrup at home is easier than you think. With just two simple ingredients, you can whip up a delicious sauce that rivals store-bought options. This recipe is perfect for beginners or anyone who wants a quick and tasty treat.
Why Make Caramel Syrup At Home?
Homemade caramel syrup adds a special touch to desserts and drinks. Why make it at home? It saves money and gives you control over flavors. Let’s explore the benefits of making caramel syrup yourself.
Save Money And Customize Your Flavor
Buying caramel syrup from stores can be costly. Prices can go up quickly, especially for quality brands. Making caramel syrup at home is a budget-friendly choice. You only need sugar and water. This simple recipe costs less than store-bought options.
By making it yourself, you can also customize the flavor. Want a hint of vanilla? Add a drop of vanilla extract. Prefer a saltier taste? Sprinkle in some sea salt. Here are some flavor ideas:
- Vanilla Caramel: Add vanilla extract.
- Sea Salt Caramel: Mix in sea salt.
- Coffee Caramel: Stir in coffee extract.
- Cocoa Caramel: Blend in cocoa powder for a chocolatey twist.
Here’s a quick cost comparison:
| Store-Bought Caramel Syrup | Homemade Caramel Syrup |
|---|---|
| $5.00 for 12 oz | $1.50 for 12 oz |
Making caramel syrup at home is a simple way to save money. Plus, you can create flavors that suit your taste. Enjoy caramel just the way you like it.
Healthier Option: No Artificial Additives
Store-bought caramel syrups often contain artificial additives. These additives can affect taste and health. Making caramel syrup at home allows you to control the ingredients. You use just sugar and water. This means no preservatives or artificial flavors.
Homemade caramel syrup is also lower in calories. It has only 48 calories per tablespoon. This is a great option for those watching their calorie intake.
Here are some health benefits of homemade caramel syrup:
- No preservatives
- No artificial colors
- No artificial flavors
- Lower calorie count
With homemade caramel syrup, you enjoy a treat that is safer and healthier. You can indulge without worrying about what’s inside. Choose quality ingredients for a better taste and health.
Simple Caramel Syrup Recipe With 2 Ingredients
Equipment
- Small pot
- Wooden spoon or heat-resistant spatula
- Measuring Cups
- Stove
- Heatproof container or jar for storing
Ingredients
- 1/2 cup sugar
- 1/2 cup boiling water
Instructions
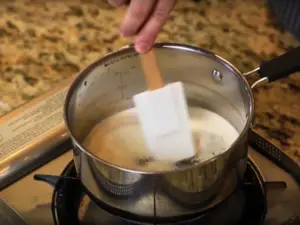
- Begin by measuring out the sugar. Use a cup or kitchen scale for accuracy. Choose granulated sugar for best results. Place the sugar in a saucepan. Use a heavy-bottomed pan to prevent burning.Now, turn on the stove to medium heat. Watch the sugar closely. Stir it gently with a wooden spoon or heat-resistant spatula. This helps the sugar heat evenly. Do not leave it unattended. The sugar can burn easily.As the sugar heats, it will start to melt. It changes from white to a golden color. This process takes around 5 to 10 minutes.
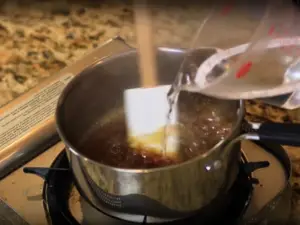
- Next, prepare to add boiling water. Boil water in a kettle or saucepan. Use about 1/2 cup of water for each cup of sugar. Make sure the water is at a rolling boil. This step is important for dissolving the sugar properly.Carefully pour the boiling water into the melted sugar. Do this slowly and cautiously. The sugar may bubble up. This can be dangerous, so keep your face away. Stir the mixture gently with a spoon. It will help combine the sugar and water.The color will change as you mix. It should become lighter. Continue stirring until the syrup is smooth. If any sugar sticks to the sides, scrape it down.Once mixed, let it cool for a few minutes. The syrup will thicken as it cools. Now you are ready for the final step!
- After adding the boiling water, bring the mixture back to a boil. This step helps dissolve any remaining sugar. Turn the heat to medium-high. Boil the syrup for about 5 minutes. Stir occasionally to prevent sticking.As it boils, watch for the syrup to thicken. This indicates it is ready. You can test the consistency by dipping a spoon into the syrup. Let it cool slightly. It should coat the spoon without being too runny.Once the desired thickness is reached, remove it from the heat. Allow the syrup to cool completely. Store it in a clean glass jar.Your homemade caramel syrup is now ready to enjoy. Use it on ice cream, pancakes, or in coffee. The possibilities are endless!
Notes
Achieving Perfect Color
The key to a great caramel syrup lies in achieving the perfect color. The color not only affects the taste but also the appearance. A well-made caramel syrup can enhance desserts and drinks, making them more appealing.
Golden Amber
Golden amber is the ideal shade for a light caramel syrup. This color offers a sweet, buttery flavor that complements many dishes. To achieve this beautiful hue, follow these tips:
- Use a heavy-bottom saucepan to ensure even heat.
- Keep the heat on medium to avoid burning.
- Stir gently at first to dissolve the sugar.
As the sugar heats, it will begin to melt and bubble. Watch closely as it changes color.
The process can be broken down into steps:
- Heat the sugar until it starts to melt.
- Observe the color change from white to light yellow.
- Continue heating until it reaches a golden amber shade.
Here is a simple table to help you understand the color stages:
| Color Stage | Description | Flavor Profile |
|---|---|---|
| White | Granulated sugar | Neutral |
| Light Yellow | Begins melting | Sweet |
| Golden Amber | Ready for syrup | Buttery, sweet |
Once the golden amber color is achieved, remove the pan from heat. Pour the syrup into a heatproof container. The syrup will darken slightly as it cools.
Dark Caramel
Dark caramel has a rich, deep flavor. This color is perfect for more intense desserts. It adds a bold taste to sauces and toppings. To create dark caramel, follow these steps:
- Use the same heavy-bottom saucepan.
- Increase the heat slightly to speed up the melting process.
- Stir less frequently to allow the sugar to brown evenly.
As the sugar continues to cook, it will reach a darker shade. This can take a bit longer than golden amber.
Here’s how the process unfolds:
- Watch for the sugar to turn light brown.
- Keep heating until it turns a deep amber.
- Remove from heat just before it becomes dark brown.
Be careful not to let it burn. Burnt sugar creates a bitter taste. Here’s a quick reference table:
| Color Stage | Description | Flavor Profile |
|---|---|---|
| Deep Amber | Almost dark | Rich, sweet |
| Dark Brown | Overcooked | Bitter |
Once the desired dark caramel color is reached, immediately pour it into a container. The heat will continue to cook it slightly, so act quickly.
Cooling Process
Understanding how to cool your caramel syrup properly will improve its flavor and consistency. This section will guide you through the cooling process.
Temperature Control
After cooking your caramel syrup, temperature control is vital. Rapid cooling can change the syrup’s texture. Here are steps to cool your caramel syrup effectively:
- Remove the saucepan from heat.
- Let the syrup sit for a minute.
- Transfer it to a heatproof container.
Let the syrup cool naturally. Avoid placing it in the refrigerator right away. Rapid cooling can cause the syrup to harden too much. Instead, allow it to cool at room temperature. This process helps maintain the right consistency.
For best results, use a candy thermometer. Here is a simple temperature guide:
| Temperature (°F) | Texture |
|---|---|
| 220°F | Thin syrup |
| 240°F | Medium syrup |
| 260°F | Thick syrup |
Check the temperature as the syrup cools. This will help achieve the perfect thickness for your caramel syrup.
Storage Tips
Proper storage extends the life of your caramel syrup. Follow these tips for best results:
- Use a clean, airtight container.
- Store it in the refrigerator.
- Keep it away from direct sunlight.
Homemade caramel syrup can last up to two weeks in the fridge. Before using, let it sit at room temperature. If it thickens too much, warm it gently on the stove. Stir until smooth.
If you want to store it longer, consider freezing. Here’s how:
- Pour syrup into ice cube trays.
- Freeze until solid.
- Transfer cubes to a freezer-safe bag.
Label the bag with the date. Caramel syrup cubes last up to three months in the freezer. Use them in coffee, desserts, or sauces. Enjoy your delicious homemade caramel syrup!
Flavor Variations
Flavor variations make your syrup even more enjoyable. They can turn a basic syrup into a special treat. Here are two delicious variations to try: Vanilla Infusion and Salted Caramel.
Vanilla Infusion
Adding vanilla to your caramel syrup brings warmth and richness. The vanilla flavor complements the sweetness of the caramel. It transforms your syrup into a flavorful topping for desserts. Here’s how to create this delightful variation:
- Start with your basic caramel syrup recipe.
- Once the syrup is ready, remove it from heat.
- Add 1 teaspoon of pure vanilla extract.
- Stir well to combine.
This simple addition makes a big difference. You can use vanilla-infused syrup on:
- Pancakes
- Ice cream
- Fruit salads
- Coffee or lattes
The table below shows how much vanilla to add based on your syrup quantity:
| Syrup Amount | Vanilla Extract |
|---|---|
| 1 cup | 1 teaspoon |
| 2 cups | 2 teaspoons |
| 3 cups | 1 tablespoon |
With just a little vanilla, your caramel syrup can shine with rich flavors. Enjoy the sweet, aromatic notes in every drop.
Salted Caramel
Salted caramel is a favorite for many. The mix of sweet and salty creates a perfect balance. This flavor variation is easy to make. Just follow these steps:
- Make your caramel syrup as usual.
- Once done, remove it from heat.
- Add ½ teaspoon of sea salt.
- Mix well until the salt dissolves.
This salted version is perfect for various uses. Try it on:
- Brownies
- Cakes
- Popcorn
- Apple slices
Here’s a quick guide on salt measurements:
| Syrup Amount | Sea Salt |
|---|---|
| 1 cup | ½ teaspoon |
| 2 cups | 1 teaspoon |
| 3 cups | 1½ teaspoons |
Salted caramel syrup adds a gourmet touch to any dish. The salty bite enhances the sweetness, making every bite a treat.

